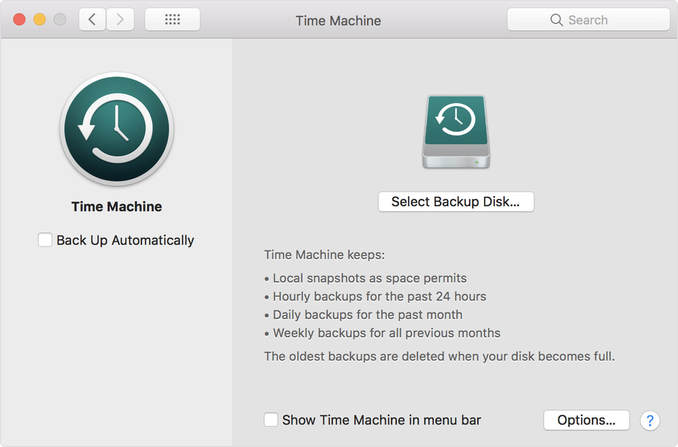
 Whether you accidentally deleted a file or lost a bunch of data to a hard disk crash, it's always a good idea to backup your machine regularly. Both Windows and Mac OS X have good built-in backup utilities, so you can start with just a few steps. That's what you need to do. 1. How to Use and Restore from Time Machine Your Mac comes with a built-in software for simple backup. Just open the Time Machine and connect an external drive to Mac (First format the hard drive with Disk Utility), you may be asked to if you want to use this drive to back up with Time Machine. Tick the option “Encrypt Backup Disk” to protect the drive with a password and select “Use as Backup Disk”. Time Machine can automatically backup all files so that you can recover a single file or the whole system from the backup. Note: The oldest backups are deleted when your disk becomes full. Step 1. Click “System Preference” to open Time Machine and turn it on, then select the connected drive for backup. Step 2. Time Machine will start to back up all files and it will show the remaining time to wait. Optional you can exclude data from the backup. Step 3. After the backup completes, right click the drive and select “Eject” to unplug it. Alternatively, you can directly move specific files or folder into your external hard drive for backup. If you deleted or lose a file or folder, just restore them from Time Machine backup. Step 1. Click “System Preference” and “Enter Time Machine” in menu bar. Step 2. Find the target file or folder, and click “Restore”. Step 3. Time Machine will copy that file back to the original location on your hard drive. 2. How to Backup Mac to iCloud You only need to set up iCloud on Mac in a few easy steps, then the backup is automatic. Step 1. Update your Mac OS to the latest version. Step 2. Select “System Preferences” in Apple menu. Click iCloud and enter your Apple ID. Choose what you want to back up, such as photos, mail, contact, notes, etc. (you have 5GB of free iCloud storage. If you need larger space, upgrade your storage plan) Step 3. Click “Option” and enable “iCloud Photo Library”, “My Photo Stream” and “iCloud Photo Sharing”. 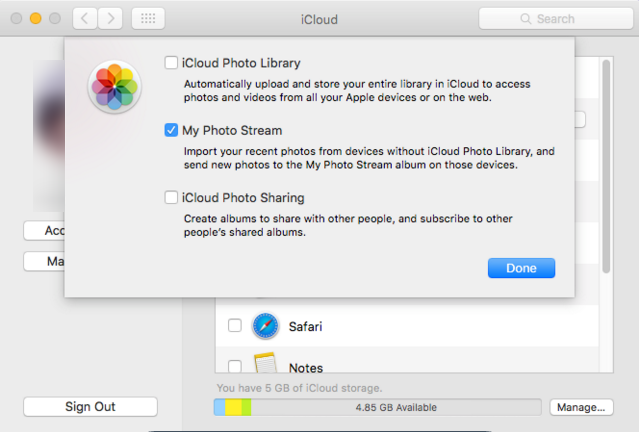 Without backups, it is really hard to restore data. Although you can use a third-party software like RePicvid Free Photo Recovery, there is no guarantee that all your data will be restored.
0 Comments
WMV (Windows Media Video) is a series of Video Codec and its related Video coding format developed by Microsoft, which is part of Microsoft's Windows Media framework. WMV contains three different encoding and decoding: as a competitor of Real Video, the original video compression technology for WMV originally developed for streaming application on the Internet; The other is the compression technology of WMV screen and WMV image to meet the needs of specific content. After being standardized by the Society of Motion Picture and Television Engineers, the WMV version 9 was adopted as a publishing format for physical media, such as HD DVD and Blu-ray, the so-called vc-1.
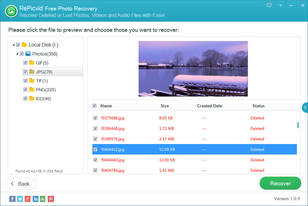
Microsoft has also developed a digital container Format called Advanced Systems Format (ASF) to hold the video encoding of WMV. Under the same video quality, WMV files can be played while downloading, so it is suitable for playing and transmitting online. It is preferred to record videos in WMV format with digital camera or mobile phones. However, a recorded video may be accidentally deleted or lost, which is a common problem that anyone can face. So what if your precious or memorable video is deleted or damaged? How do you recover these video? You may feel panic and don’t have a clue. But relax, since the deletion is not permanent. By using recovery tool, you can easily restore the deleted video files. Remember avoiding using this particular drive to store new file content. One of the Best WMV File Recovery Software RePicvid File Recovery (Windows) scans the entire drive in few minutes to restore WMV file. With the help of this tool, videos files that are lost due to deletion, formatting or device corruption could be easily restored, including WMV, AVI, MP4, WAV, MOV, MPEG, M4V, etc. In addition, you can also use RePicvid File recovery software to conduct video recovery from different storage media. Advantages of RePicvid Free Photo Recovery:
Method reference: https://www.gihosoft.com/data-recovery/recover-deleted-photos-videos-from-sd-card.html So last night I connected my SD card to a computer to save my photos. Well I deleted those photos but they keep coming back. they won't delete!!! And when i format my SD card to the phone, it doesn't erase all existing files like it should. How can I get this fixed???
My SD card has been in use for one year or so. Suddenly it becomes a read-only SD card and needs to restart the mobile phone. Soon after the restart, it gets normal but want me to restart again. Then I put the card on the phone or even on the computer, all the files inside can be read and copied. But files can't be deleted and card can’t be formatted. I try to delete a file, whether it's on the phone or on the computer, the display is deleted, but it comes back upon refresh. If you are facing the same problem above, don't worry, there are several reasons for this problem: 1. SD card is write protected 2. SD card is corrupted Here's the solution: 1. Beside part of the micro SD card, there is a small protection switch. Multiple plug operation could cause the card is write protected by accident, making the card read-only. You can check whether the write protect switch is open or not. 2. Try several formatting ways: For example, direct formatting on cell phone, using card reader, or formatting on disk manager of computer, through CMD command, or third-party software. Try them one by one. 3. Make a simple fix to the SD card and then do the above.
Reference: https://fossbytes.com/how-to-repair-corrupted-pen-drive-or-sd-card/ If you've got any additional methods, please share those with us in the comments. AAC/M4A is a kind of audio format exploited to replace MP3, and its sound quality is much better than MP3. Users who have no backup habit always find themselves faced with data loss. When problem strikes, they get AAC files lost and typically it involves in various reasons. In other words, there's no sign to anyone. You should especially remember that before they are gone for good, don’t use the storage device where the deleted AAC files are. Because this measure will maximize the chance of successful recovery. And a professional AAC recovery software would make things easier and stress-free. RePicvid Free Photo Recovery is capable of recovering deleted AAC files from many devices, such as computer/laptop, hard drive, all kinds of memory card, various styles of USB flash drive, etc. In addition to restoring the deleted data, it could also figure out the loss on account of device being formatted or damaged. At the same time, you could rely on it to recover other formats of audio files, like MP3, WAV, WMA, etc. Detailed Steps to Recover Deleted AAC Audio Files
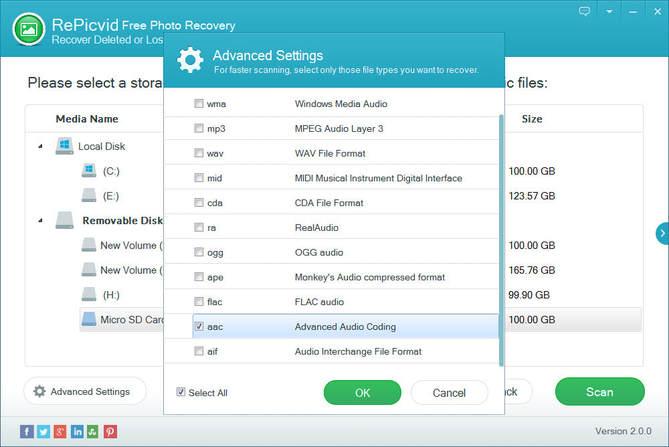 As I mentioned above, it’s a golden time to perform aac recovery upon they got deleted. Otherwise, it will present an extra layer of trouble to block you solve the problem.
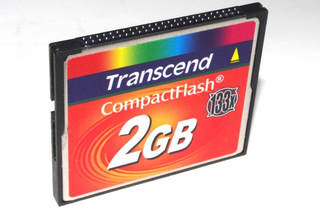  CF (Compact Flash) card is a special kind of memory card widely used in PDA, laptop, digital camera and various devices including desktop computers. With limited capacity and large size, CF card has small competitive advantage over SD card. Still, some users use CF cards to store data. But accidentally, you would suffer from CF card problem and data loss. Free CF card recovery software would help you solve the following questions:
How to Complete CF Card Recovery RePicvid Free Photo Recovery Software offers you a general solution for CF card recovery in Windows and Mac system. This software emphasizes the great features, and pay same attention to user experience. It guides you to makes choices step by step, then perform scanning and recovery. Beyond that, it also supports recovering files from SD card, XD card, Multimedia card, SDHC card, micro/mini SD card, etc. Whether or not you know something about CF card recovery, just try it to recover deleted files or photos from CF card. Step 1. Connect CF card to computer with card reader. Step 2. Click on a file option for CF card recovery. Step 3. Select the disk where the CF card resides on. Step 4. Click on “Advanced Settings” to select file formats to be restored. Step 5. Scan CF card to hunt for all files and preview the deleted ones. Step 6. Recover deleted files or photos from CF card and save them to another disk. Tips: 1. If you only recover photos from cf card, just choose the free “Photo /Graphic” recovery. 2. RePicvid Free Photo Recovery supports Sandisk/Lexar Cf card recovery. |
AuthorStudy solution of data recovery from different storage devices. ArchivesCategories |
 RSS Feed
